


| Web Pages by Students |
ABC of C Language by Shailender Sharma |
Bootable Pen Drive by Avtar Singh |
e-Trash or e-Treasure? by Pallavi Bagga |
Lakshya by Rabina Bagga |
OOPs Concepts by Navjot Kaur |
Fitness First by Ankush Rathore |
Information Systems by Kajal Gupta |
Quiz Contest in C++ by Rajnish Kumar |
Core Java (Tutorial) by Shyena |
C Language Q&A by Anmol Sharma |
HTML 5 Tutorial by Kishan Verma |
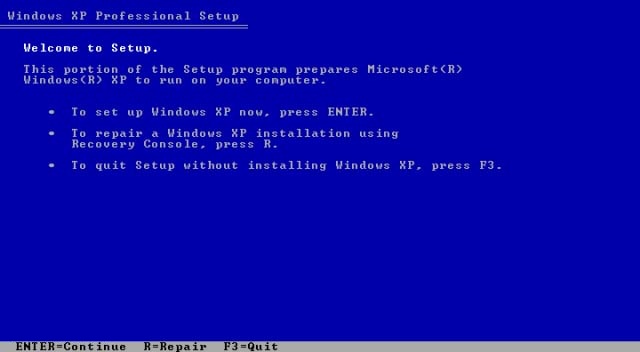
1. Load in your Windows XP CD and Boot it, It will Display Welcome to Setup Screen, To Start the Windows XP installation process, Press Enter key.
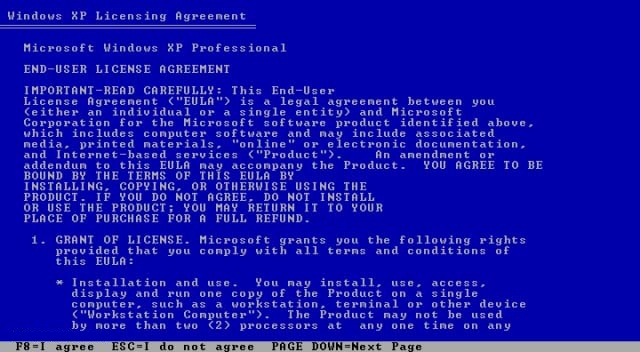
2. Windows XP Professional End User Licensing Agreement, use Page Down key to read through the license agreement and press F8 key to Agree.
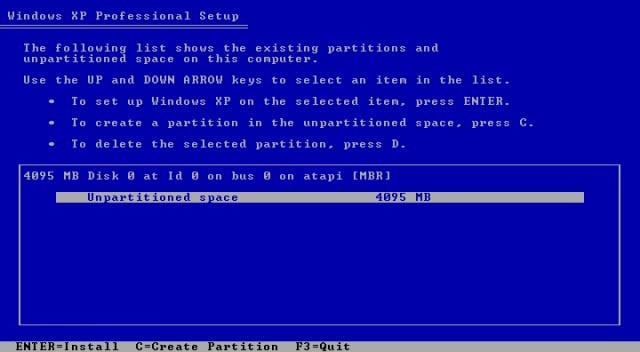
3. Setup then display the list of existing partitions and unpartitioned space on the system. Press Enter key to setup Windows XP on selected item, or press C key if you want to create partition on the disk.
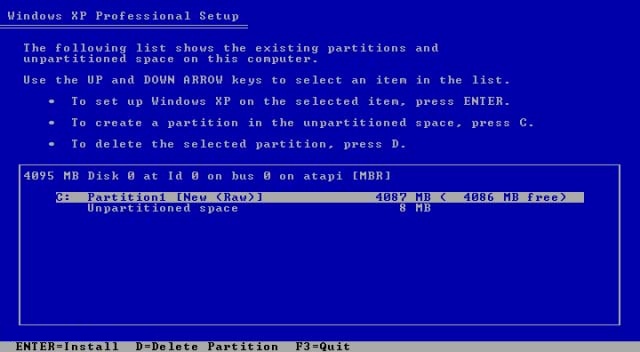
4. The Setup display your System Disk available space. To create partition, enter the amount of disk space for the partition size to be create. Then press Enter key.

5. Select the Partition where you want the Windows XP install and then Press Enter key.
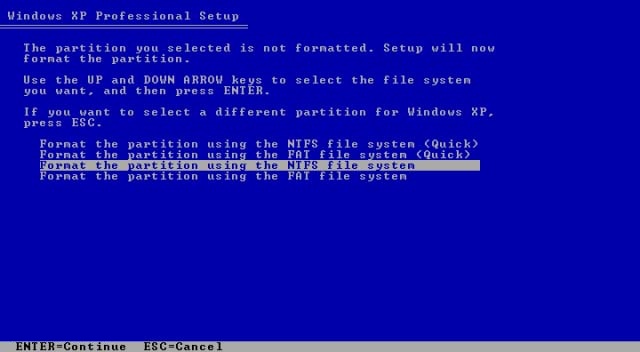
6. Select to Format the partition using the NTFS file system. Then press Enter key to continue with the setup process.
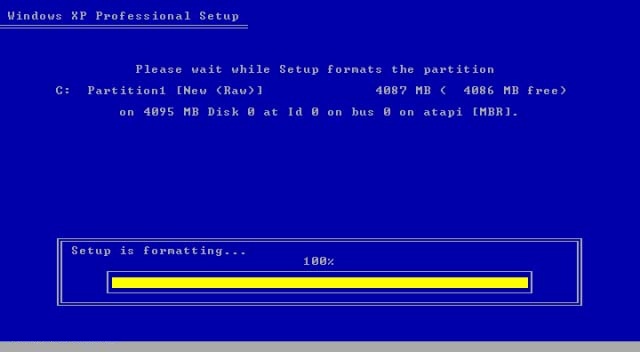
7. The Setup then Formatting the partition selected with the NTFS file system. Wait until the process finish.
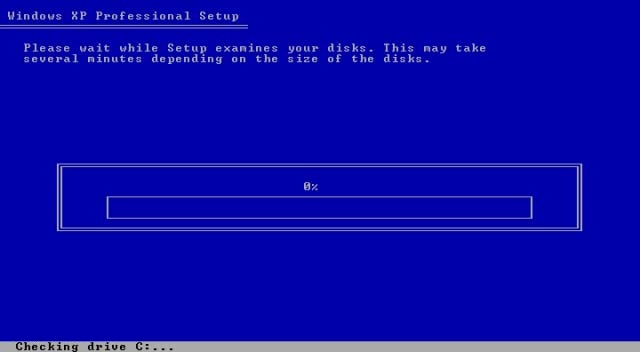
8. The Setup process then examines your system disk drives.
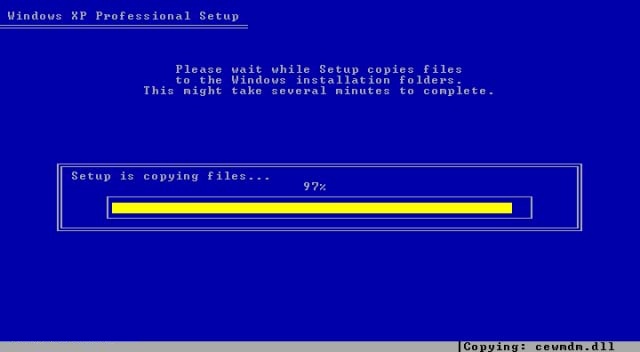
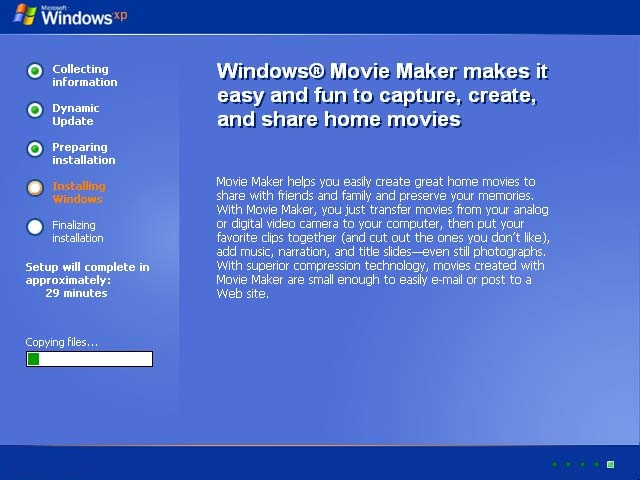
9. Windows XP Setup on progress and copying files to Disk.
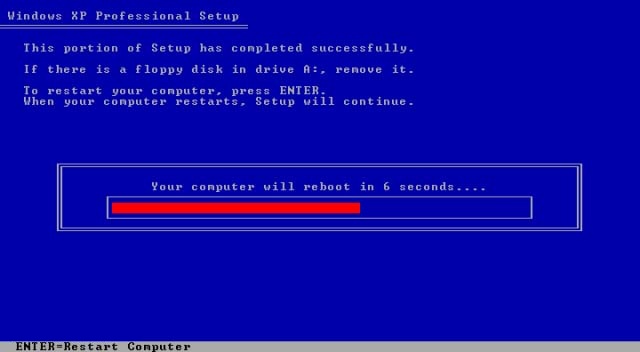
10. Portion of Windows XP setup completed successfully. The setup process reboot your computer automatically or you can press Enter key to restart the computer.
11. First Screen of Windows XP after Reboot.

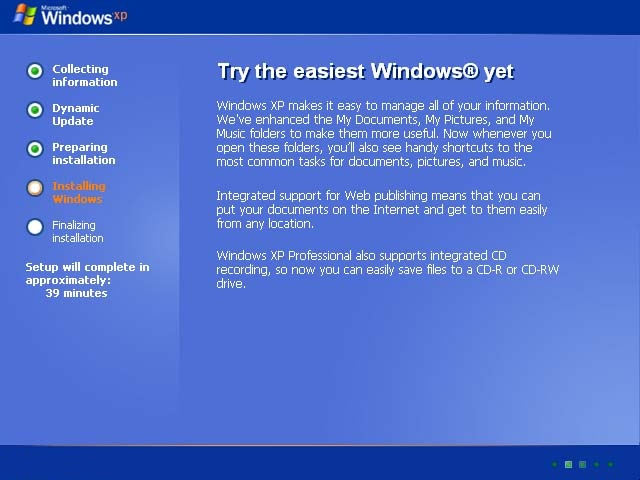
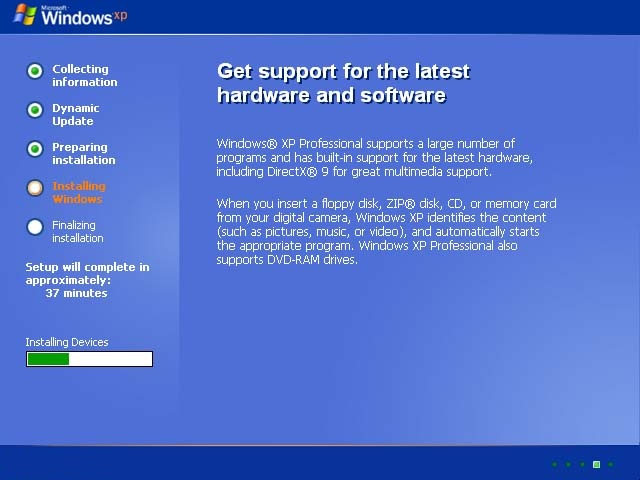
12. Then the Windows XP professional Setup start collecting Information.
13. Installing Devices, Windows XP Professional Setup still at work.
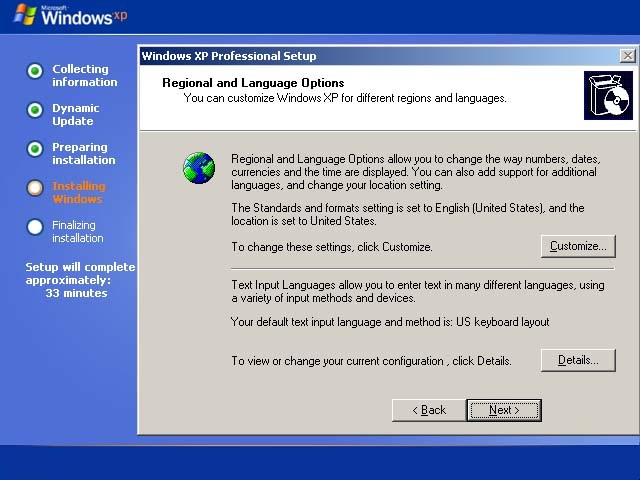
14. The screen then display Regional and Language Options. Make changes to the options if you need to or just click Next button to continue using the default setting. Note: from this screen forward, you can use the mouse key to click on the button :-
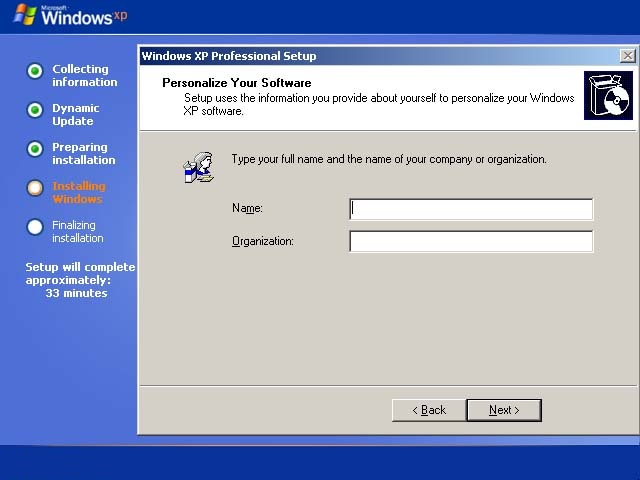
15. Personalize Your Software, on this screen put your full name and name of your company or organization
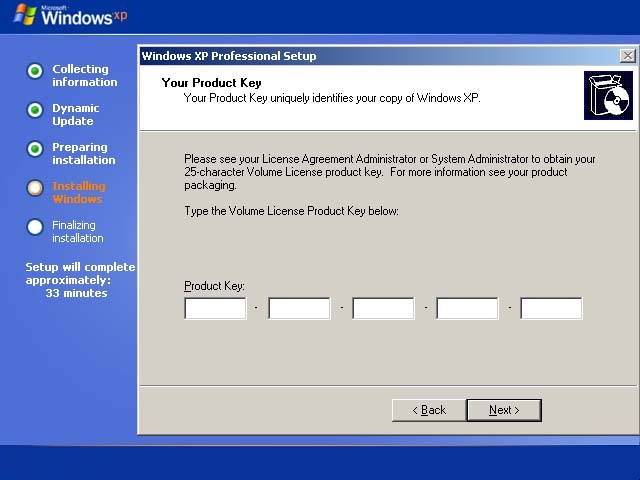
16. On the Windows XP Product Key screen, you need to type in the correct 25 character volume license product key on the text box provided. Please contact your system administrator to get the volume license product key. Click Next button after you key in all 25 character volume license product key on the box.
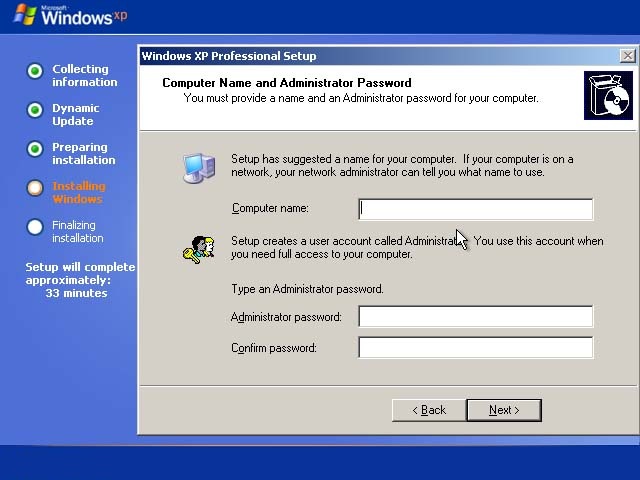
17. On this Computer Name and Administrator Password screen, you need to provide the Computer name, Administrator password and you need to Re-Type Password in the Confirm password box. Just remember or write down the administrator password because you may need to log in as administrator one day to gain full access on the system. Click Next button to proceed.
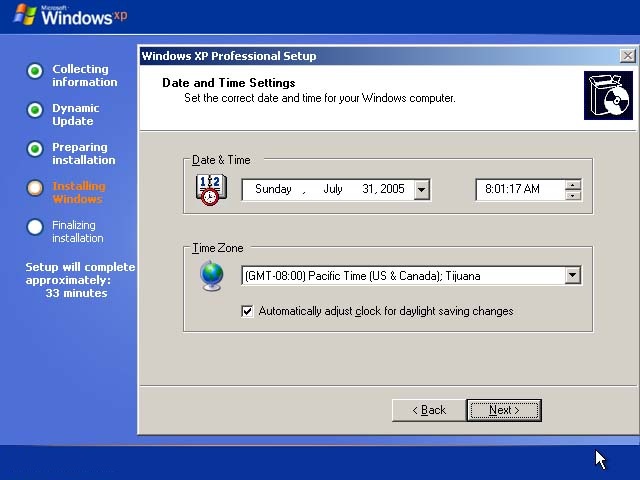
18. On the Date and Time Settings screen, you can set the correct date and time for your Windows XP Professional system, then choose from the drop down list the correct Time Zone setting for the system time. Click Next button after finish with the configuration setting.
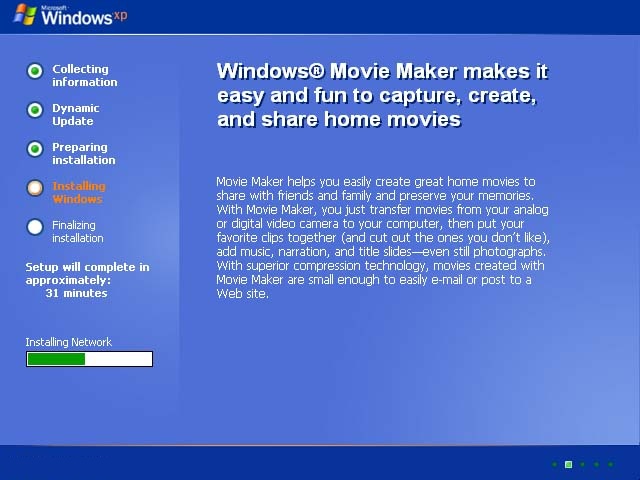
19. Installing Network Screen, and the screen display the status bar show that the estimate time to complete the installation process is down to 31 minutes.
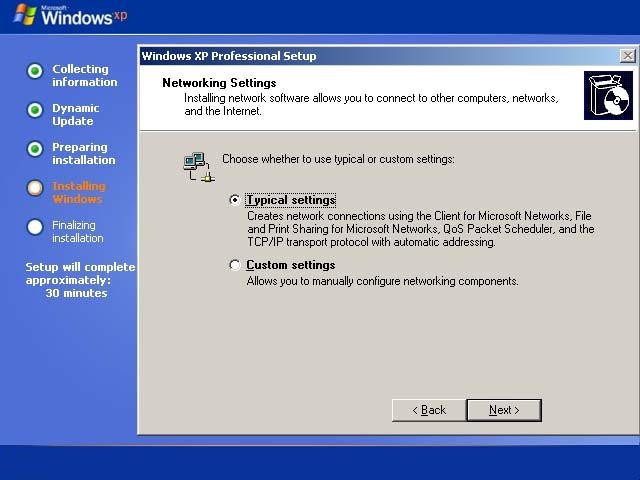
20. The Networking Setting screen. On the Networking Setting screen you can configure the system networking components manually or you can leave the radio button on 'Typical Settings' to accept the default configuration. Click Nextbutton to proceed.
21. The Workgroup or Computer Domain screen, enter the workgroup name if your computer belong to the existing workgroup or leave the default WORKGROUP and If your computer is a member of the domain on the network, click the radio button on 'Yes, make this computer a member of the following domain:' and then type in the domain name in the box provided. Click Next button to proceed.

22. Windows XP then start copying files to the System Hard Disk.
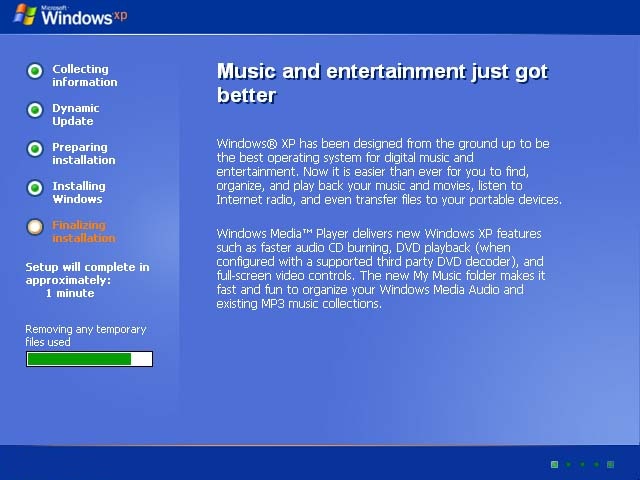
23. The Windows XP Setup screen display that the Setup removing temporary files and status bar show that the setup process will complete in approximately in 1 minute.
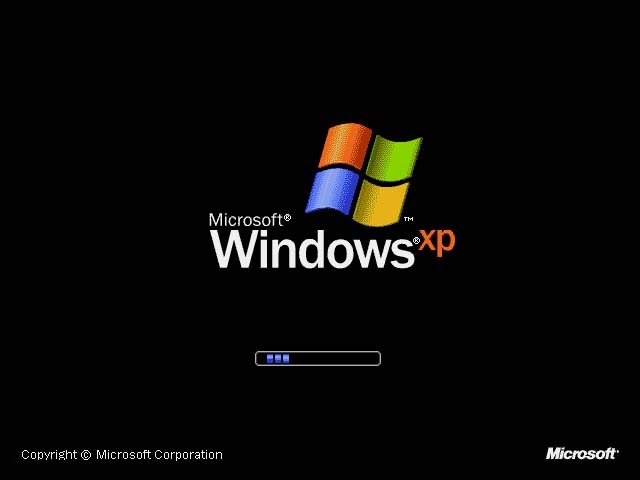
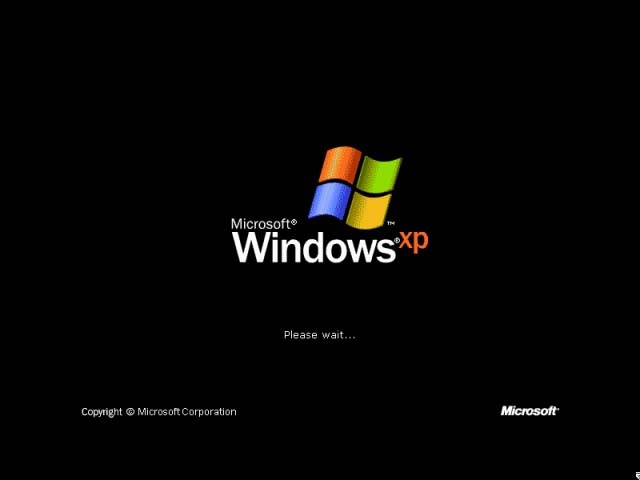
24. The process of starting Windows XP screen shot.
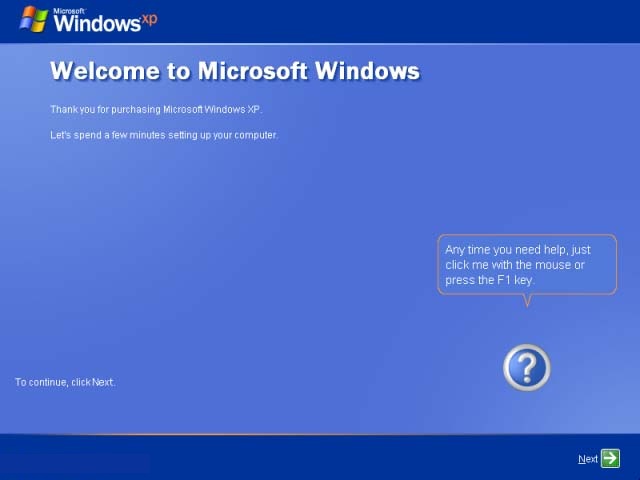
25. The welcome screen to setting up your computer. Click Next button to continue.
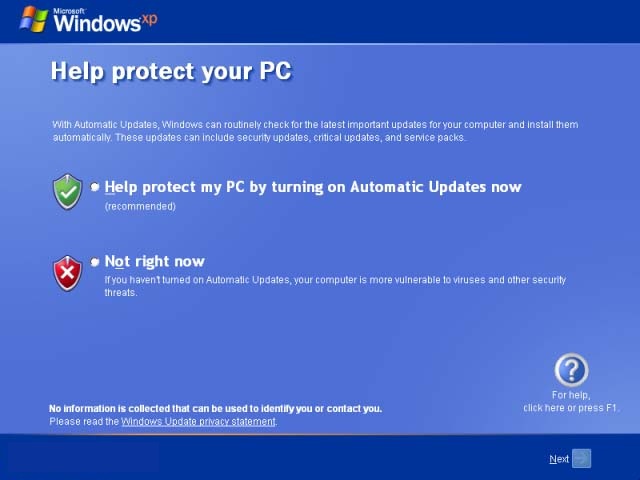
26. The setting of automatic updates your Windows XP. Click on the radio button Help protect my PC by turning on Automatic Updates now to make sure your Windows XP system check the updates (this include hot fix (patch, security, critical updates) and service packs) from Microsoft Windows Updates site and automatically install the updates. If you want to Updates your system manually just click the radio button on Not right now. Click Next Button to proceed.
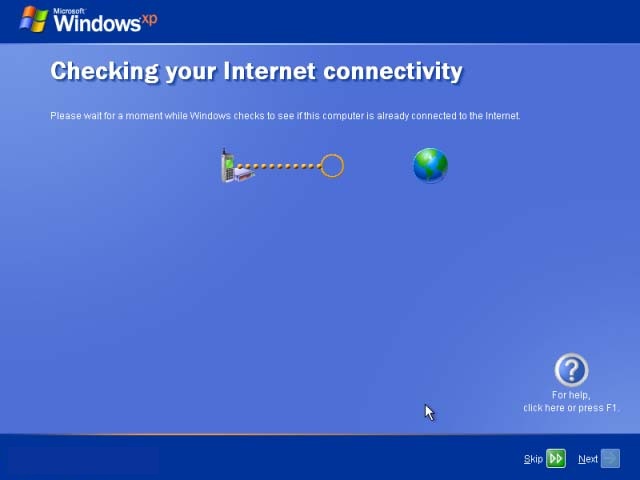
27. Windows XP setup then display the screen of Checking your Internet connectivity.
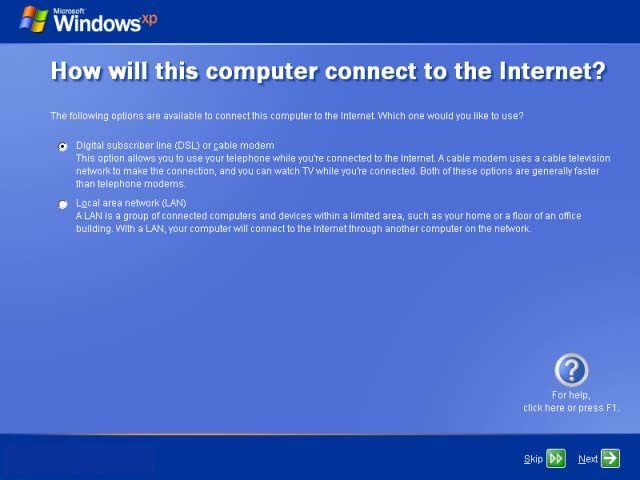
28. On this screen you can choose the configuration of your connection to the internet, click the radio button on Local area network (LAN) to setup the configuration of you network card. Click Next Button to proceed.
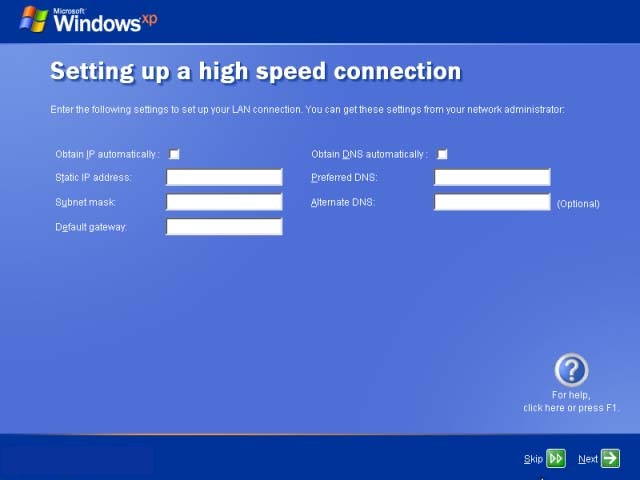
29. The Setting up a High Speed Connection (or LAN) screen. On this screen you can setup the setting of your network IP Address. Obtain the IP Address, subnet mask, gateway and DNS from your network administrator and put in the box, or if your network using the DHCP to get the ip setting and DNS setting just click the checkbox provided. Click Next Button to proceed.
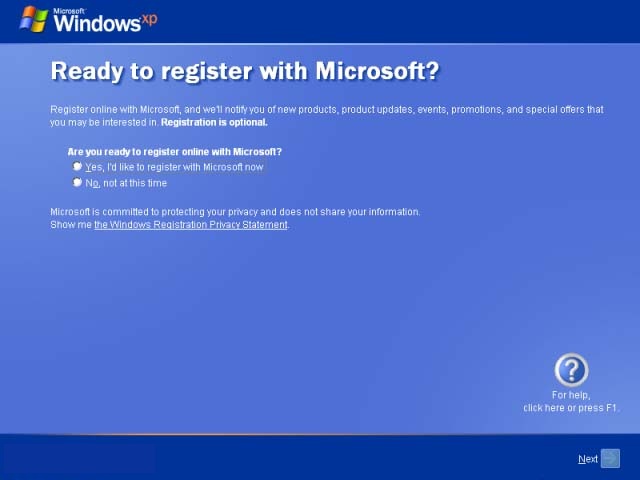
30. Register Windows XP screen, Click on the Yes, I would like to register with Microsoft now to start registering your Windows XP now or if you want to finish with the installation and setup process and you want to register later click on No, not this time. Click Next Button to proceed.
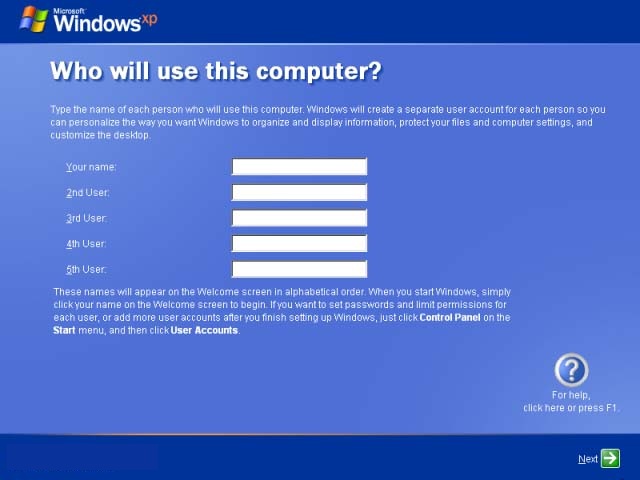
31. On the user account screen, type in the user name that who will use the computer. Windows will create a separate user account for each user so that they can log in to the system with their own Username and Password. Click Next Button to proceed.
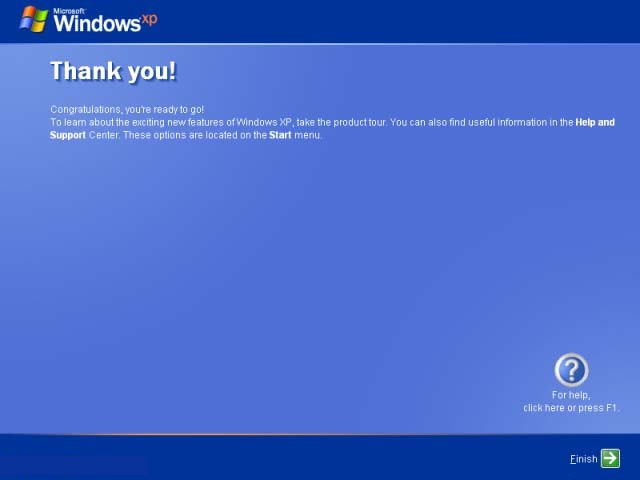
32. Thank you and Congratulation screen. Click Finish Button to finish the Windows XP setup configuration.
Windows XP Installed....